Hello hello! My laptop is suffering from technical difficulties, so I haven't been able to post in a while. I've finally managed to pry Stephen's Macbook out of his hands long enough to post, though, so here we go!
I know I'm jumping the gun on this, but I just can't resist getting started on my Christmas crafting/decorating. As long as I don't do anything overtly "Christmas-y," I think I can get away with it before Thanksgiving, right? Here's hoping.
This particular craft idea has been brewing for quite awhile, actually. It combines my increasing love of neutral decor and my lifelong love of books. There was no hope for me after I fell in love with literature in 7th grade when I read Dickens' A Tale of Two Cities. I went on to get an entirely unmarketable degree in English Literature, which I followed up with an unfinished Masters degree in Victorian Lit. Alas, neither pays well. Or, in my case, at all. Bummer. However, I can put my love of books to good (if unpaid) use by decorating my house with them. Tada!
Ok, so lots of people have been making super cute things out of book pages lately, and I've been itching to try something myself. I decided to try my hand at making some ornaments from a book I bought at the Friends of the Library book sale for 10 cents. Fantabulous price, plus, it's about the sea, which is another of my lifelong obsessions. I have several, apparently.
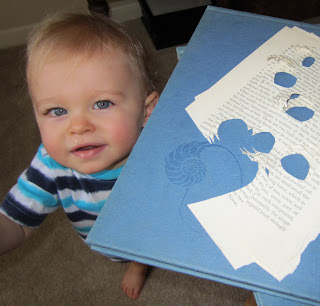
First, I cut out small, totally irregular circles from some pages.
Oh look! A sleepy little helper who'd like to steal my scissors. Sorry, sir. Not today.
Anyway, I started with 4 pages stacked together, and ended up liking that number in the finished product. After I cut the circles, I sewed the little stack together down the middle with white thread.
I then trimmed the excess thread from the BOTTOM of each stack, leaving the top thread attached. Finally, I simply folded the pages back on themselves, to create an evenly fanned out little globe!
They turned out great! After each little globe was fanned out, I tied a knot in the still-attached-top-thread and hung them from my skinny little branch tree. I found the branch in our yard and plopped it straight into that rice-filled stoneware jar!
Oh, and because I just couldn't resist, I added that cute little bunting, too. It makes the whole tree, don't you think? I'm totally in love with the whole thing. Here's a closeup of one of the ornaments:
So there you have it! My not too overtly Christmasy Christmas craft. What do you think? Do you like them as much as I do? I think there may be more of these popping up around our house.
If you DO like them as much as I do and don't feel like making some yourself, you're in luck! I'm selling sets of these in my Etsy shop! Check them out here.
Wednesday, November 16, 2011
Sunday, November 6, 2011
A coffee table transformation
My first few attempts to write this post were severely hampered by a bad case of writer's block. Seriously, when was the last time I wrote anything longer than an email? I've been putting off posting until I had a good project with decent photos to show off, and I've finally got both!
So here it is, my very first ever furniture refinishing project! I couldn't be more pleased with how well it turned out. Over the last few months, I've been spending my precious few uninterrupted minutes each morning reading home decorating and crafting blogs, drifting around the DIY section of Pinterest, and feeding my Etsy addiction. The combination of these activities has made me desperate to start using some of the many gorgeous ideas floating around blogland and the interwebs. Enter the wonderful Shaunna West of Perfectly Imperfect. Her blog is overflowing with just the sorts of projects I'd love to try, and she just so happens to have published a wonderful ebook, Creating Your Masterpiece, all about refinishing furniture! Haha! Inspiration AND very detailed instructions all in one place. Heavenly, I tell you.
I decided to make my first attempt on our very old coffee table. I've always loved the shape and size of this table, but the finish? Not so much. My husband's aunt was the original purchaser, I believe, and she handed it down to his parents, who handed it down to him, who brought it with him when we got married. A long and storied career this table's had. Not to mention a few run-ins with my husband's childhood dog. She evidently found the table's feet to be irresistably gnaw-able. Delightful.
Anyway, when the table came to me, it was stained a dark brown with a very glossy finish. After several years of my kiddos climbing all over of it (I pick my battles, people), the already wobbly coffee table was in definite need of some shoring up. Stephen took it apart and reassembled it using some new screws and copious amounts of wood glue. This baby is solid now.
I went with a light blue/green paint color (Olympic's "By the Sea," I believe), and then created a really beautiful aged effect with Valspar's Antiquing Glaze (thanks, Shaunna, for the tip!). I finished it with 2 coats of Minwax Paste Finishing Wax (3 coats on the top). I can't believe how perfectly the glaze picked up all the little dings the table's accumulated throughout the years. Now, rather than sad and dilapidated, our coffee table is perfectly lovely and wonderfully worn in all the right places. I love it!!
Here are a couple of sort-of-before shots. I'd already done some sanding, but this gives you an idea of the original color and condition of the table. See the dog chew marks on the feet? Cute, huh? (Oh, and I really hope you enjoy the meticulously styled background in these next few photos. I worked hard to achieve that garage-chic look.)
Here's a final after photo. Do you guys like the results as much as I do?
I'm linking this post to Thrifty Decor Chick's Before and After party,
Miss Mustard Seed's Furniture Feature Friday,
and Perfectly Imperfect's random furniture link party!
Subscribe to:
Posts (Atom)


