Saturday, July 21, 2012

Summer Entryway 2012

I hope you're having a lovely, relaxing Saturday!  We just wrapped up VBS at our church yesterday, so I'm pretty exhausted (not least because of the cold I apparently picked up while on crafts duty!).  I don't have the energy to do much crafting today, so I thought I'd share some pictures of our entryway for this summer.  Yes, yes, I know, summer started a long time ago, especially here in the subtropics.  I'm just slow like that!  Actually, most of this was done several weeks ago, but I added a couple finishing elements recently that I really love. 

The glass top table in our entryway is a piece that we received as a hand-me down from a friend of my mother-in-law.  While it had really beautiful lines, she had done a faux finish on it that just wasn't doing it for me.  Here's what it (and my daughter) used to look like:


The faux finish was pretty uneven and it really didn't highlight the prettiness of the table's legs (which, coincidentally, do a nice job of highlighting the cuteness of Lily's baby legs, don't you think? :) )  I used a light ocean-y blue paint for my re-finish and just hightlighted a little with a dark glaze to pick up the details.


Those pictures also give you a peak at what I've done on the top of the table for this summer, too!  Do you like the table's new look?  I really love it!  It has a much softer look that fits better with our house's beach cottage feel.

So, now that you've seen the base, here's the vignette I've come up with for our entryway this season:


I absolutely love it!  I practically passed out when I saw that perfectly chippy old window in my neighbor's yard during our street's annual sale last year.  The under layer is a fantastic sage green that peaks through the lovely cream on top.  And $5?  Score!  It's very old and heavy, though, so it took some serious drilling to get that baby securely on our wall.  The little bunting I just threw together from some burlap and cotton scraps I have in my extensive (read: excessive) stash.


And I LOVE how that paper bag flower turned out.  I followed Destiny's tutorial from over at A Place for Us with a couple paper grocery bags.  I couldn't be happier with it!


FYI, Destiny's tutorial didn't mention what she did for centers, so I just balled up some leftover bag scraps and glued them in the center of my rosette.  Worked pretty well!

On the table, I've place some of my favorite collected beachy, summery things.  That big chunk of driftwood is actually from a local creek.  Our family was playing there one day a couple years ago and I spotted it.  I desperately wanted to bring it home, so my ever-patient husband lugged that water-logged sucker all the way back to our car, about a half mile way.  Isn't he sweet?


That little piece of plastic fern fell out of an arrangement I was making early this month, and Lily thought it should go right there on the table.

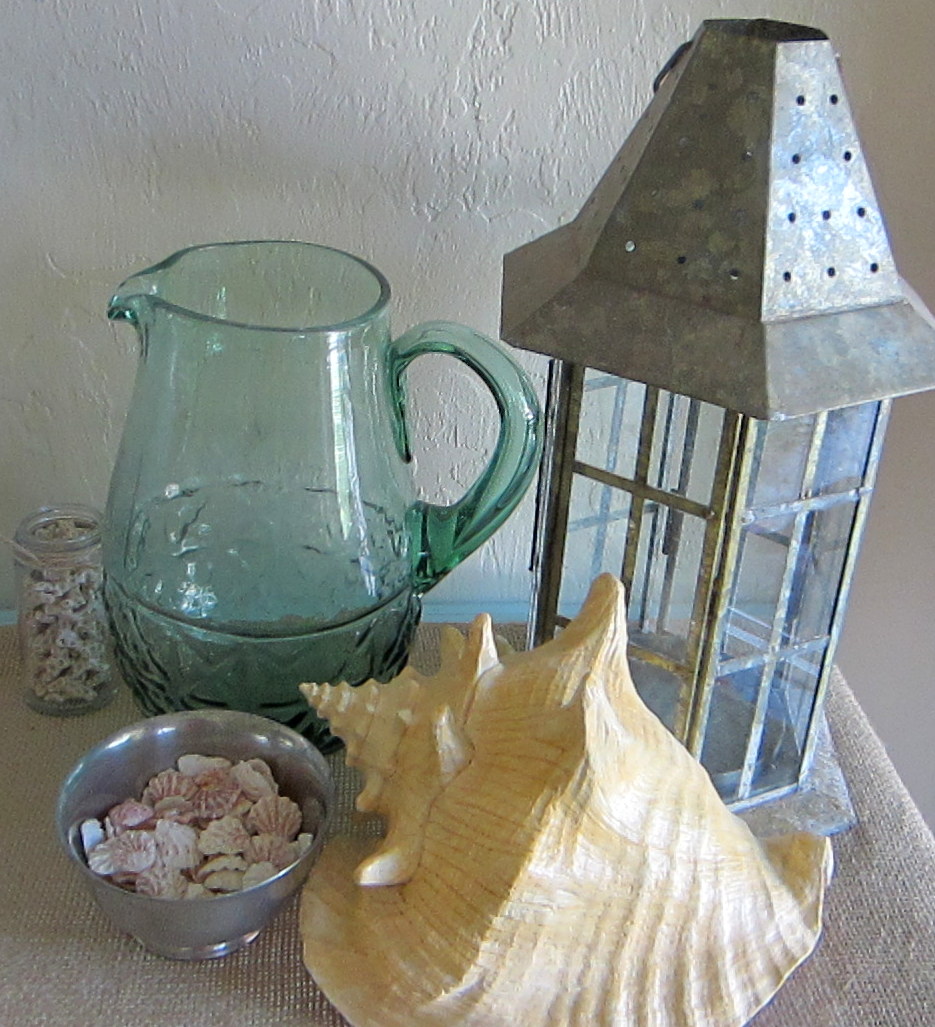
The lantern on the other end of the table is one of my favorites, and I found it at a thrift store for $3.  Can you believe that?!  That big conch shell is actually a replica, but the shells and coral in the glass jar and little silver dish are from various beach trips we've taken.  Oh, and that fantastic green glass pitcher came from Anthropologie.


So there you have it!  Our beachy, cottagey entryway for the summer!  It'll probably stay that way for a while, though, since summer lasts so long here in Florida.  Have a great weekend!

I'm sharing here:
TDC Before and After

Friday, July 20, 2012

Salvaging a bleach disaster

Once upon a time, there was a beautiful $50 Anthropologie top, that made its owner feel extra pretty each time she wore it:


Then one sad day, I got sloppy with some bleach...


*Sob!*  My lovely, lovely shirt is ruined!  I mean, I wear things with lots of stains.  Probably waaaay too many, but I pretend that having kids gives me a free pass.  "Oh that?  Ha ha, my silly kids must have spilled on me again!  What can you do?"  That bleach, though, is a little too obvious even for me.  Ever since I did that I've been hiding that shirt in the bottom of my t-shirt drawer trying hard not to look at it.  So, so sad.

But fear not!  I finally found a way to (partially) redeem my stupid misdeed!  You can't really tell from those photos, but the fabric is a really nice slub jersey that I knew I could do something with.  The other day I came across an old Clinique bonus gift bag (hey, inspiration can come from anywhere, people!) that had a sweet pattern of butterflies and hot pink poppies, and I knew I had a use for my sadly abused Anthro shirt.

Some of my favorite (and best selling) items from my Etsy shop are my pillow covers, so I decided to try my hand at reinterpreting the Clinique design for a linen pillow cover.  Here's what I came up with:


Isn't that so bright and happy?  I love how it turned out!  My daughter saw it on our dining room table, which doubles as my sewing table, the morning after I made it and told Stephen that Mommy had made the prettiest pillow ever.  Why, thank you very much, you discerning almost-5-year-old :)  Here's a closer picture of one of the poppies:


I had fun doing the black stitching around the centers; I think it gives the poppies such a nice hand drawn look.  I just free-hand drew the poppies' shapes onto some of the shirt fabric that I'd backed with Wonder Under (an iron-on product that makes any fabric into an adhesive one).  I then simply ironed the poppies, stems, and center onto the linen and machine stitched them all to give them even more staying power.  This one is available here in my shop, but I love this pillow so much that I may have to make one for us to keep.  That would apparently make Lily happy, too.

So the moral of the story is, even if you do stupid things like ruining one of your favorite items of clothing, all hope is not lost!  You can salvage something from your mess, I promise.  Join the movement!  Upcycle!  (As an aside, I have such a love-hate relationship with that ridiculous word.  The English major side of me gags a little every time I hear/read it, but the creative, crafty side of me really loves the concept.  Alas, until I come up with a better word, I'll have to use that grossly over used one.)

Linking up here:
TDC Before and After

Friday, July 13, 2012

A tiny terrarium

Why, hello!  Today I wanted to tell you about a quick but lovely little project I worked on the other day.  It needs a bit of back story, though, so hang tight for the crafty action!  Last month the kids and I went up to Michigan to visit my parents for a week, and tons of fun was had by all.  Lily climbed on the rocks:

 While James tried to lift them:


Look how red his little face got from trying to push that 2 ton boulder!  What a boy :)  They even watched some driveway fireworks together:


I think my dad had just lit a firecracker, hence Lily's face.  Anyway, I digress.  While we were there I went to my favorite secondhand shop and found some seriously great treasures.  When I got back and showed my mom my haul she casually said something like, "Oh, I have this box of old skeleton keys that your grandmother saved throughout her life.  Would you like some of them?  I just keep them in this box."  Um, what?!  Gorgeous old skeleton keys with a real family history?  Yes please, I'll take the lot.  I would have, too, but Mom said I had to leave some for my pesky little sister.  Drat. 

When I got home with my babies and all my antique treasures, I started thinking of ways I could combine some of my finds.  I've been really loving terrariums lately, so I thought I'd try to throw one together.  While the woods behind our house are blessed with lots of beautiful varieties of moss, I'm not overly fond of crawling through the thick, mosquito-y Florida undergrowth to collect it, so I decided to raid my stash of the dried stuff.  Here's what I came up with:


That gorgeous glass cloche and stand came from the secondhand shop.  Isn't it perfect?  To make the little hill for the moss, I just molded some aluminum foil into a ball and then flattened it on one side.  The mushroom, which I got in Tennessee, is made from some carved wood and a nut from the walnut family (I can't remember what type exactly).  Lily loves the little key from my grandmother's stash.  She says it's the key to a secret castle in the forest. 

I love how this little beauty turned out!  It only took about 15 minutes to put together, and I'll never have to mist it to keep the moss alive.  Win. Win.

Saturday, July 7, 2012

A new bedside table and a promise

Soooo, clearly I haven't gotten into the swing of posting regularly yet.  I apologize for the ludicrously long gap between my last post (January, seriously?!) and today's and I cross my heart and whatnot that I'll try to do better from now on.  Promise!

I do have good news, though!  Even though I haven't been posting, I have been taking lots of pictures to document all the stuff I've been working on.  So without further ado, here's installment number 1 of many catch-you-up posts!

Over the last few months I've been working on slowly redecorating my daughter's bedroom.  She's transitioned from her toddler bed into a (drumroll please...) twin size bed!  Way to go my sweet, sweet girl.  As a result of that move, I've felt the need to update her bedroom to more of a big kid feel.  Additionally, our son will eventually be sharing that room with her so I'm trying to make it a good room for both of them.  I've had an ocean theme in there since we moved in, but I've decided to go with more of a bright and colorful forest theme.

I'll be doing several posts on the progress I've made, but today I thought I'd share the super cute bedside table makeover I did.  Ever since I refinished our coffee table I've been looking for another piece to paint, and I found the perfect thing in this little chest of drawers from the Habitat for Humanity thrift store.


She needs some work, huh?  I'd already started sanding a little before I took these pictures, but they give you a pretty good idea of how she looked before I started working.  The whole thing was spray painted (very poorly, I might add) in a glossy black.  I'm a pretty bad spray painter myself, so I sympathized with all the crackly, drippy spots the previous owner had made.  As you can see, whoever owned this table before me decided to dress 'er up with a nice thick covering of garish butterfly and flower decals.  The one's I had already removed are in a pile on the top in the above photo.  They left pretty nasty sticky spots that I had to work hard to sand down.


Don't you love those big fat wooden knobs?  Those things drive me crazy, so I knew from the beginning that they were goners.  I let Lily choose their replacements and I think she did a great job choosing!

With all the bright colors I planned to use in their room, I wanted to go with something neutral for this table.  I've been loving all the grays and chippy old wood I've seen on Pinterest lately, so I decided to try gray with some dry-brushed white on top to give the piece some age.  I didn't get any in-process pictures (oops), so here's the final product!


Tada!  Isn't it cute?  Lily chose the prettiest blue milk glass knobs, and I think they look really beautiful with the grey.  I'm sorry these pictures don't capture much of the dry-brushing detail.  It turned out really well!  To protect the finish I did three coats of wax on the exterior and one coat inside the drawers.


Since Lily chose the blue knobs I decided to add a little surprise to compliment them.  I have lots of the lovely blue paint from our coffee table leftover, so I used that to give a bright pop of color to the inside of the drawers.


That lamp is one I've had for a while, but for this redo I added those rosettes to the shade to give it a little more punch.  Like the owl?  I made this one myself, but it was inspired by this one from Kerry's sweet Etsy shop.  Here's the table with the bed:


Doesn't that look nice?  I love it how it all turned out!  And look at that cute little curly-headed photo bomber. :)  I'm so proud of that quilt, too.  It turned out even better than I'd imagined!  If you're interested in having one, I do sell them here in my Etsy shop.  They're really bright and fun, and Lily loves to snuggle up in hers every night.

Whew!  That turned out to be a very long post!  Thanks for persevering all the way to the end!  Do you like how the big kid room is coming together?  Let me know!

I'm linking up here: southern hospitality