

Hello hello! I've got a project to share today that I'm SO excited about!
When we first got our flat panel TV, we needed a new table to accommodate the wider size. Our old Craigslist tube television was sitting on a small Walmart media unit that was both ugly and sort of flimsy. Yuck. While our budget didn't allow for a new TV and a fancy new table for it, we were able to get a perfectly good new IKEA table! We went with the Leksvik media table, which they apparently don't carry anymore! Here's how it looked before I got to work on it.

Clearly, I didn't work very hard on staging that photo :)
It worked alright in its original finish, but I knew I could improve it! At first I thought I'd just paint it, but then I saw this amazing post on KariAnne's blog. She used plain old paint stir sticks to create an INCREDIBLE herringbone top for her little side table! Isn't it amazing?

So. Cool. I knew I could do that on my TV table, so I pretty much immediately headed to Lowe's to get me some paint sticks! The only slight problem was that my tabletop is much, much bigger than the one KariAnne was working on, so I needed WAY more of those 5 gal. paint stir sticks. I used my feminine wiles (i.e. looked sorta pathetic) and asked the guy in the paint department for 25 sticks. He looked at me kinda funny, but gave them to me anyway. Then I drove to another Lowe's and asked that guy for another 20. After a few more weird looks and a plea not to tell his manager, he caved. Score and score. Having acquired my 45 pine stir sticks, I rushed home before anyone could question me about all the free pine wood I was running away with.
I started by cutting down 25 of my sticks to 8" strips and dry fitting them onto the table. This let me choose my pattern direction and get a general idea of where I'd put the sticks without too much commitment.
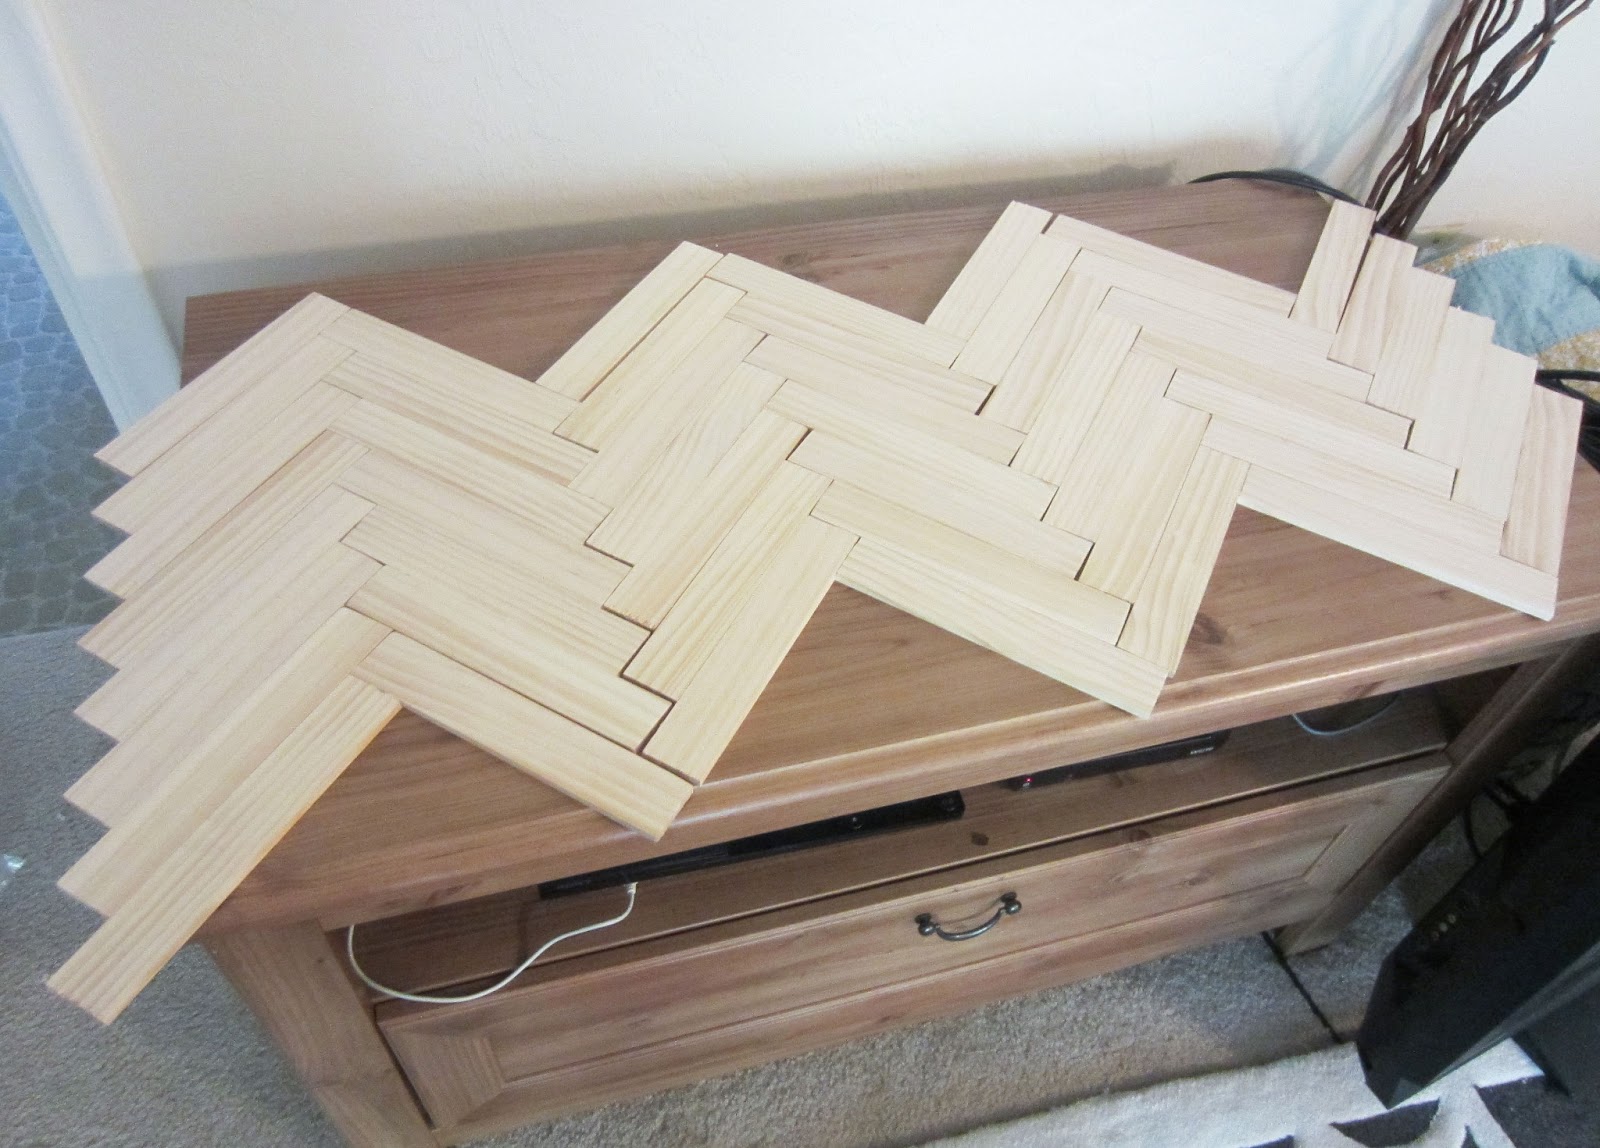
After I got the sticks arranged to my liking, I took the whole mess out into the garage where I could finish cutting and arranging. Several hours and many, many fiddly little circular and jig saw cuts later, I had a completed pattern glued down and was ready for some wood filler. I apparently didn't take a picture of the unstained top (I know, REEEEdiculous) and I'm so sorry! After all that sawing I think my brain had turned to mush. Oh well!
In any case, I used the wood filler to fill in all the little gaps between the sticks (a lot of my cuts weren't perfectly square), then sanded it until my hand was ready to fall off. After dusting off all the sawdust, it was time to stain! I went with my favorite stain (Minwax English Chesnut) and happily stained the top. Umm, yeah. The result wasn't pretty.


Isn't that absolutely gorgeous?! I'm completely in love with the warmth and tone of the English Chestnut stain, and I couldn't be happier with how the herringbone came out. Good gracious, it took a long time to do all those cuts and to completely redo the whole staining process, but it's such a glorious result that I don't even care. :)
With such a stunner of a top, I was careful to keep the painting on the body of the table simple so it wouldn't be distracting. I got a quart of AS Paris Gray for my birthday, so went ahead and used that. I know I've said it before, but I'm totally sold on that paint. No sanding and I can paint right on top of a piece of laminate furniture with absolutely zero prep? Yes, thank you, I'll take some of that! Seriously, it really is magical.
Anyway, I digress. I painted the entire table Paris Gray, but thought it was a bit too monotone once I finished. To fix that I simply painted the drawer inset with Pure White and it turned out great!

I aged the front just a tad with my favorite Valspar antiquing glaze around the edges and called it a day. I thought briefly of changing out the drawer pull, but I actually really like it so it got to stay. To finish it all off,
I sealed the
top with 3 coats of some satin finish poly that I found in the garage
(thank you, previous tenants!), and used wax for all the painted
surfaces.


I learned several things during this very long project. First, always use a power sander to sand the heck out any surface with wood filler on it. Believe me, you'll save yourself a lot of grief and annoyance. Secondly, I discovered that I actually like cheap-o Minwax Paste Finishing Wax more than Annie Sloan's Soft Wax. I did the first couple coats of wax with AS's wax, but for some reason I feel like I have more control and better coverage with the Minwax, so I did a final coat with that. I'm sure it has something to do with my totally imperfect technique, but that's what I've found to be true for me. Lastly, I like Valspar's antiquing glaze better than the AS dark wax. I just wanted a few little bits of aging on this piece, and the glaze is much better for that sort of application. I'm sure I could learn to be more precise with the dark wax and get the results I'm looking for, but at around $8 for the Valspar product versus over $30 for the wax, I'm happy to stick with the glaze for now. Hope those tips will be useful to you when you work on your next furniture re-finishing project!
I'm just pleased as punch with how this little table turned out! (Yes, I just said "pleased as punch") It fits into our living room so much better now, and is a much better reflection of my style. It's a bit of a bummer that that beautiful top has a big TV sitting on it, but I made sure to push it as far back as possible so you can still see the herringbone pattern.

-1.jpg)

I'm sharing here:
